


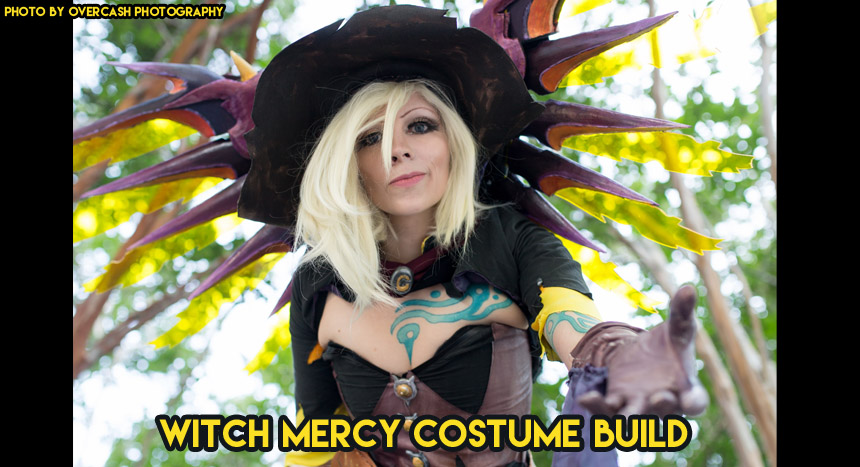
Note/warning: This costume was exhausting to build! It took me ages to finish- I kept having to put off its debut date because it was such a beast. Granted *some* of that was life issues getting in the way, but not all of them. Give yourself LOTS of time on this costume- it's full of fiddly details and if you're anything like me, you'll want them to be perfect. This costume took me about 7 months to finish, if not for life things it would probably still have been 4-5 (most of our costume builds are like 2 months tops), so that just gives you an idea of how much time it can take if you're a filthy perfectionist like me.
This build write-up is broken down by component and each component will have its own material list/resources.
Part II (shoes/hat/gloves) |
PART 1: The Dress & Jacket
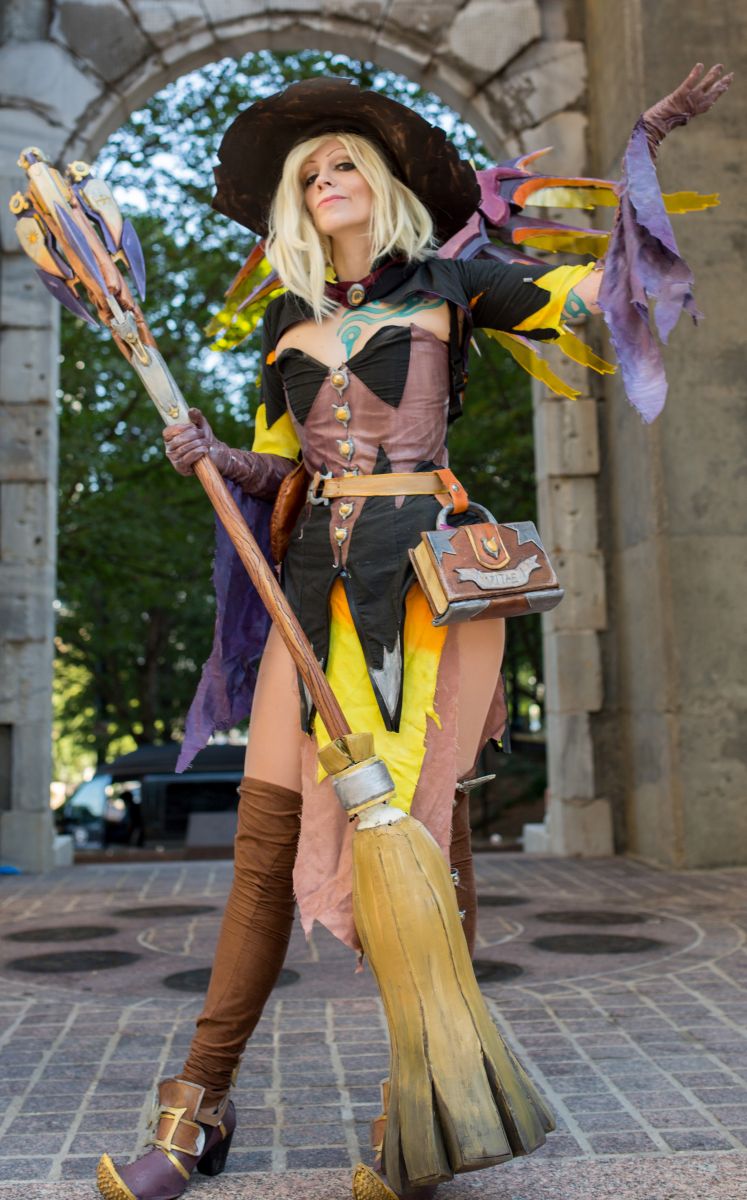
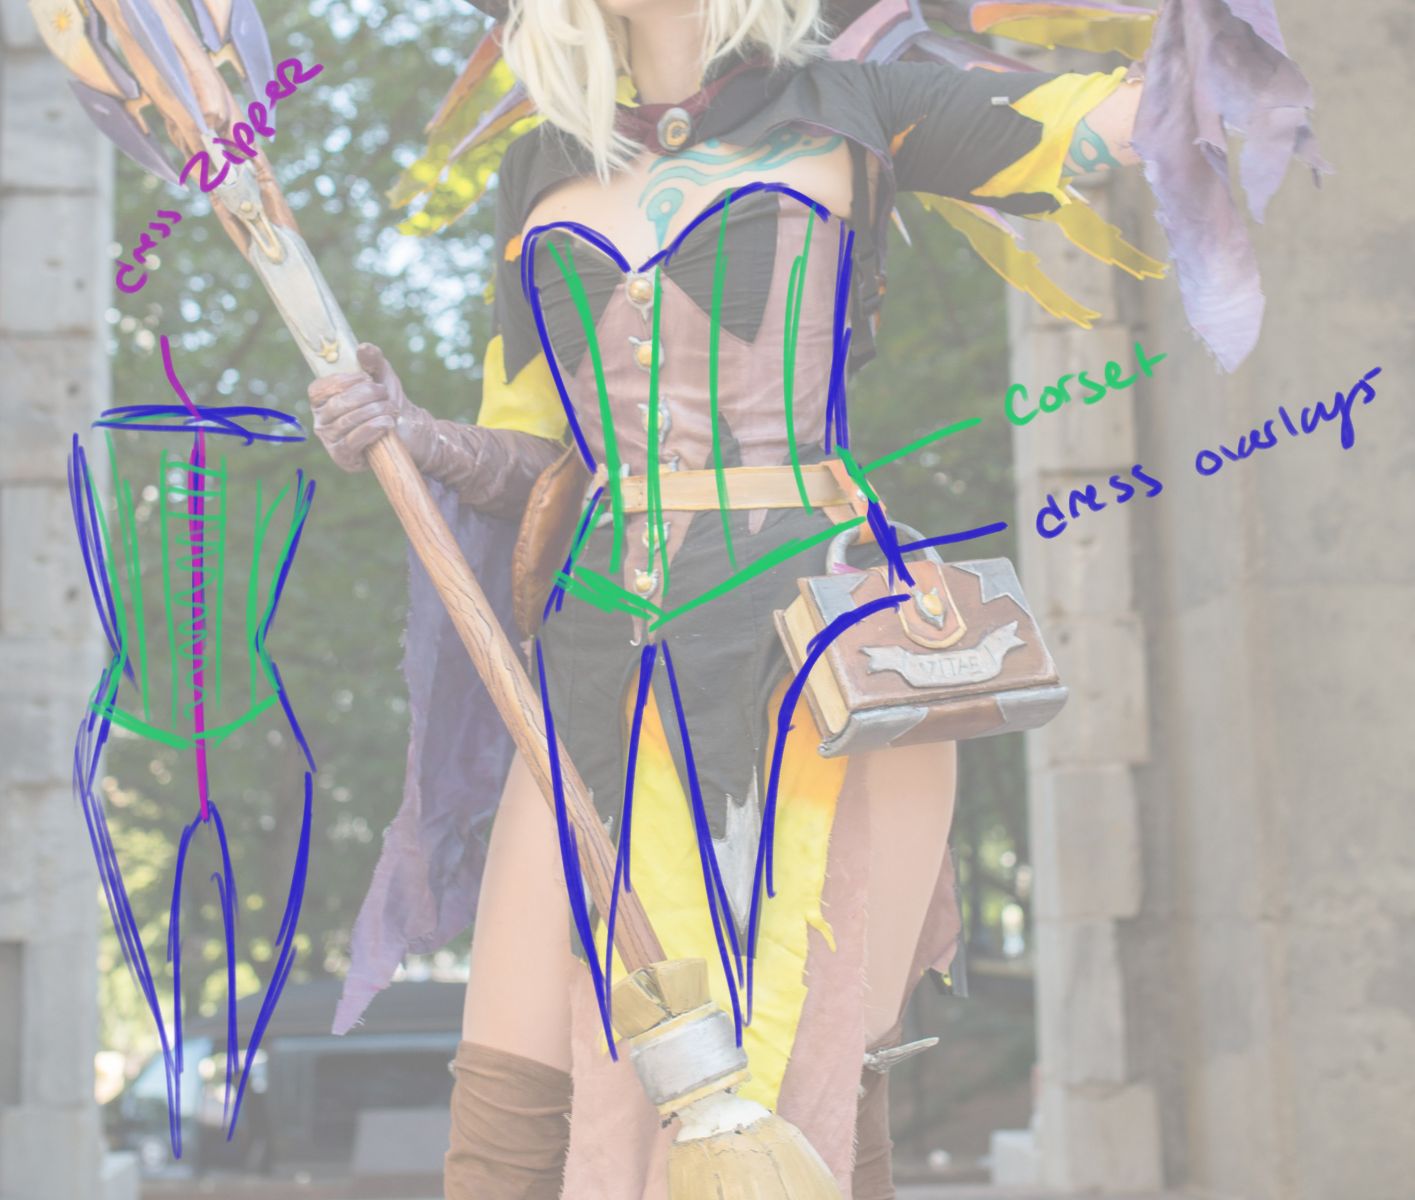
The dress is actually two separate pieces, the black part gives the shape and the silk parts (orange/yellow and brown) are a separate skirt that attaches underneath. The black part is a corset dress which is how it stays up as well as giving me more of an hourglass shape/tiny waist like mercy has. The bustline on the skin's design isn't flattering on my body, so I altered it slightly to be more flattering to me (mine has a slight plunge instead of going across like hers does). This is just the dress parts itself, I'll discuss the accessories (brooches et al) in a separate section.
Materials:
- Black medium weight cotton twill
- Reversible double knit
- garment leather
- angelus leather paints (mix of brown & purple, also used silver)
- silk twill
- procion fiber reactive dyes in "mushroom", "deep orange" and "bright yellow"
- corset coutil
- boning/grommets/lacing
- notions (black thread, black invisbile separating zipper, faux leather bias tape)
- cotton muslin for mockups
Materials Resources:
- Mood Fabrics (cotton twill for the majority of the black dress, invisible separating zipper, ponte)
- Tandy Leather Factory (for the garment leather)
- Dharma Trading Company (silk twill & dyes, leather paints)
- Corsetmaking.com (corset supplies)
- Corsets by Caroline, Amelie Plunge Corset pattern
- Joann's Fabrics (notions, muslin)
Planning and Mockups:
The idea behind the black dress portion is that there's an under corset that the dress is built on top of. This made it so it definitely wouldn't fall off my boobs since i'd be laced into the corset, and also have the added benefit of giving me more of a shape. The dress part is essentially the fashion layer of the corset. The back lacing is hidden by the zipper up the back (which also makes it mucheasier to get into and out of the garment (which is super important in cosplay!)
Note: Mockups are super important at this stage (at every stage really)! Make many mockups before you even touch your final fabric! I first made a mockup of the corset pattern to be sure that it fit me, and made the adjustments I needed to (i didn't take any pictures of the mockup stage for the corset though, sorry!).
.jpg)
Next I made the final undercorset b/c I needed to use it to draft the pattern for the dress. You can see most of the wips on the making of the corset itself in this folder.
The corset itself is two layers- the outer layer is a lighter weight black cotton twill and the inside (strength) layer is black corset coutil. The boning is a mix of flat and spiral steel bones (I use the flats at the front and the back for support, the rest are all spirals b/c I find them more comfortable).
.jpg)
Once I was happy with the fit of the dress over the corset, I moved on to my final fabric for the base dress. I sewed that up and then pinned it to my form over the corset so I could pattern out the overlay designs via draping. Mercy has A LOT going on on her dress- you can see that I had originally intended to do all of the cutout designs in the planning stage. I ended up paring it down b/c a lot of the top designs would be hidden or obscured by the bolero/shawl/wings and it was all just a lot of work for something that wouldn't be seen.
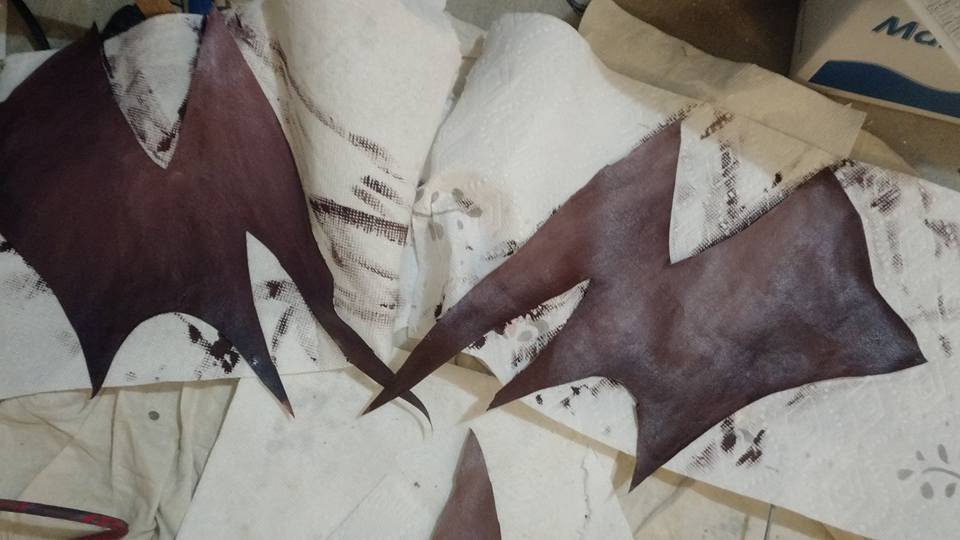
I chose to use garment weight leather for the cut outs b/c it doesn't fray (so doesn't need to be sealed or sewn down in a particular way), would take the color in a way that was similar to how hers looks. I also happened to have some extra from another project, so it brought the costs down a lot. I started with white garment leather and painted it with angelus leather paints. I used the garment leather for all the brown cutout sections as well as the silver sections on the tail tips.
Hers seems to have a slight gradient in the screengrabs I got (which could be the lighting as well- this costume looks different colors depending on the ambient light in the character viewer), so I painted the brown cutouts on a gradient as well. I say brown, but I actually used a mix of browns and purples for all the browns/purples on her outfit. I used a mix of brushes and paper towels to get the effect I wanted. Once it was dry, I sealed it with a matte leather sealant since I didn't want it to have any kind of shine.
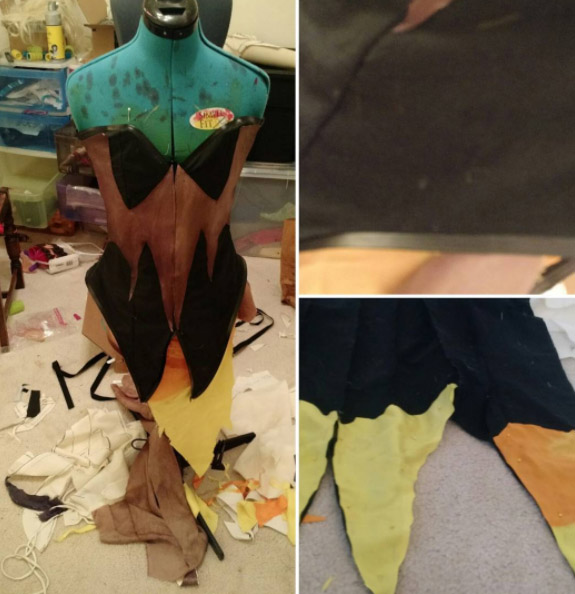
Once the pieces were finished, I carefully pinned them to the dress while it was on the form and then sewed them (I used a mix of hand sewing and machine sewing) down. Next I sewed the outside dress part to the under corset part at the top and then re-laced the corset to figure out if I needed to remove excess for the zipper. Once that was finished, I sewed in the faux lining to the tails and finished the hem with faux leather binding tape. I then sewed in the zipper.
The Underskirt/dress lining
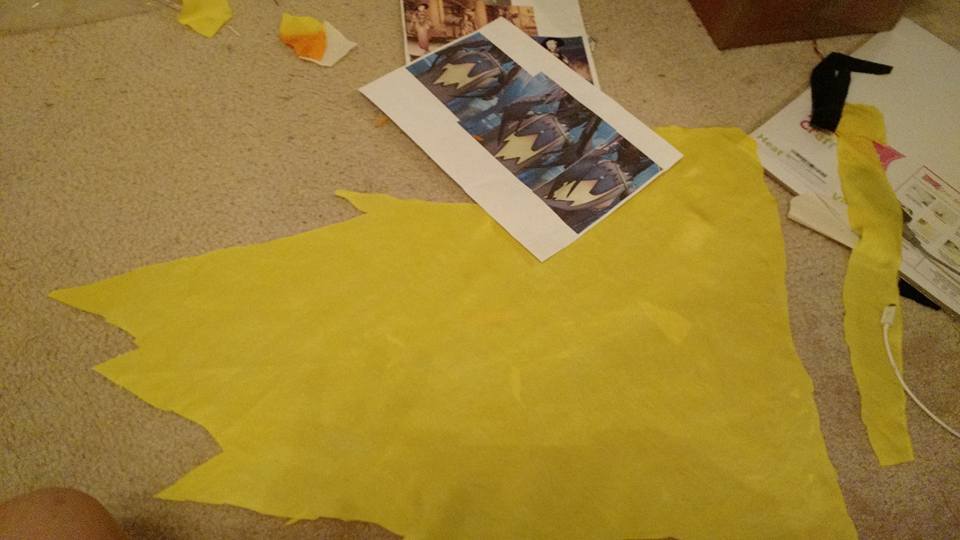
The underskirt is layers of silk twill that I dyed myself using procion fiber reactive dyes from Dharma Trading Company. I chose the silk twill because it took dye well and had a nice drape to it for what I wanted (i used it for the underskirt, the lining on the black dress, the lining on the bolero, and the flowy parts on the gloves).
First I made mockups of the bottom skirts from the muslin fabric and how I wanted them to fall- being sure to follow the reference. The front skirts are slightly longer than the back skirts and the dye pattern is also slightly different, so I spent a long time trying to stay close to that. For the yellow/orange ombre pieces, I first dyed the silk twill a bright yellow and then cut my final pieces out of that and dip dyed them to the orange individually.
 For the pieces that were a single color, I simply figured out the amount I'd need and dyed them the solid color (per the directions on Dharma's website for tub dyeing. I do most of my dyeing in a bucket in a bathtub in our spare bathroom, there are plenty of tutorials on dip dyeing out there, but if people would like I can also do a video on it).
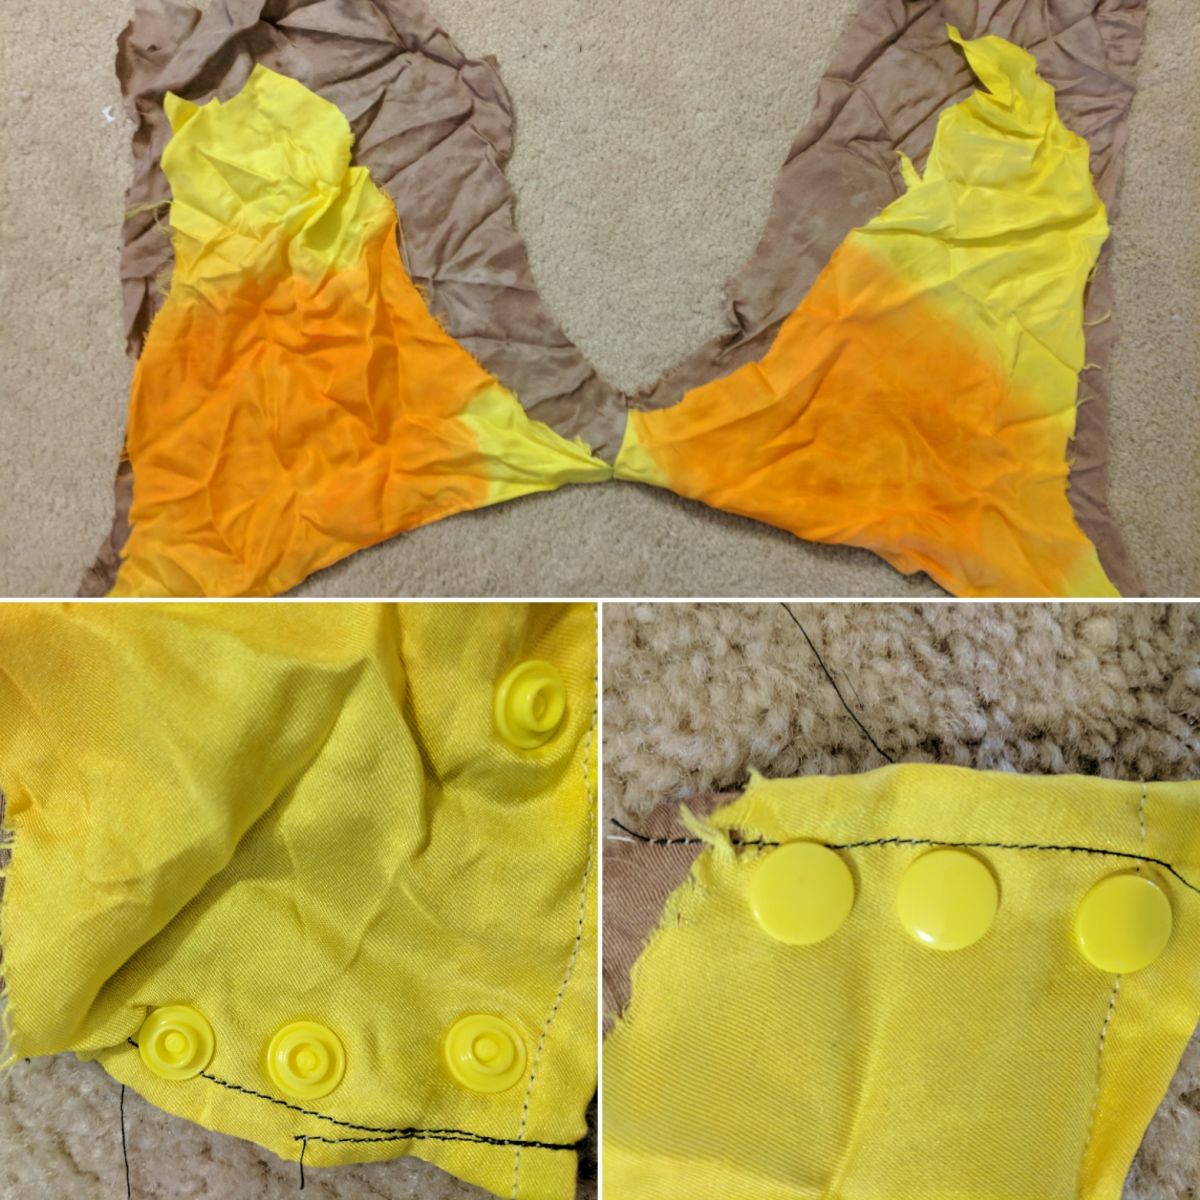
Once I had all the pieces finished, I sewed the brown and yellow/orange layers together at the top/sides which gave them a little bit of structural support (and were generally easier to deal with) but also let them still flow/drape like separate pieces. I initially played with attaching them to the black dress, but ultimately decided to make them a separate skirt piece that would sit underneath the black dress (and again make it easier to remove).
I added plastic snaps to the side seam so i could snap it on and off easily. The corset part of the black dress also holds it down, but I wanted to have the extra security of having the snaps as well
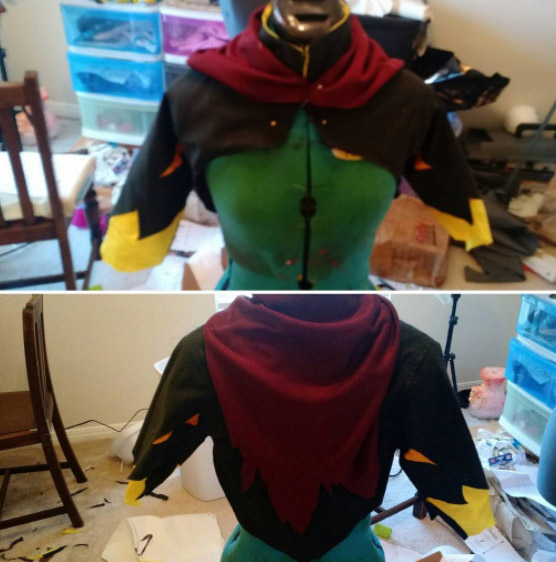
The Jacket/Shawl
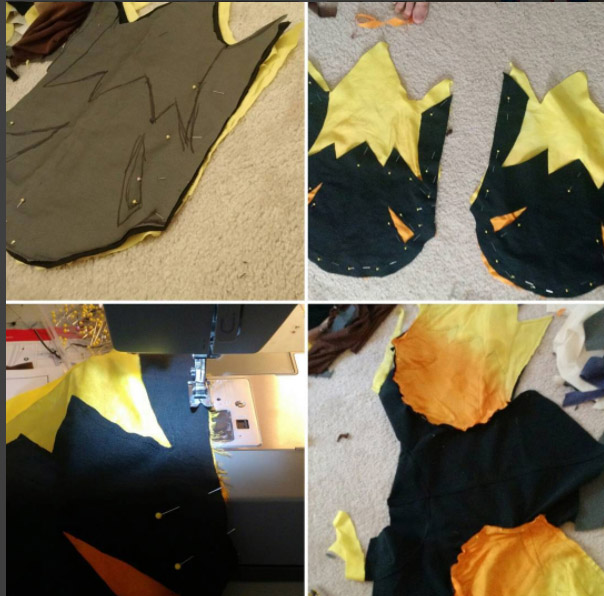
First, I draped the pattern on my dress form and made a muslin to be sure of fit etc (that's basically the first step to everything I do). I sketched the placement for the eyes and mouth of her kinda jack-o-lantern sleeves to figure out where they would fall on my arm/shoulder and then transferred the pattern to my main fabric. I placed the lining fabric underneath and sewed them down to each other along the edges (so the sleves could still fluter properly) and then sewed those to the rest of the jacket (I kind of cheated with the sleeves here, you really should add them after the armholes are already made, but I was in a bit of a hurry).
I then added a pseudo lining to the collar and the base of the jacket. It's not really the prettiest inside, but I couldn't figure out at the time how to do it fully lined and still get the eyes/mouth in exactly the right spots, so this is what I came up with.
When we got to doing the wings, I ended up having to cut some holes out of the back of the bolero where the wing holders slot through, these we just marked with chalk and then I cut them out and sewed them down.
The shawl was actually extremely easy because the fabric I got draped really nicely, so after making a mockup in the basic shape that I wanted, I just cut it out and draped it.